
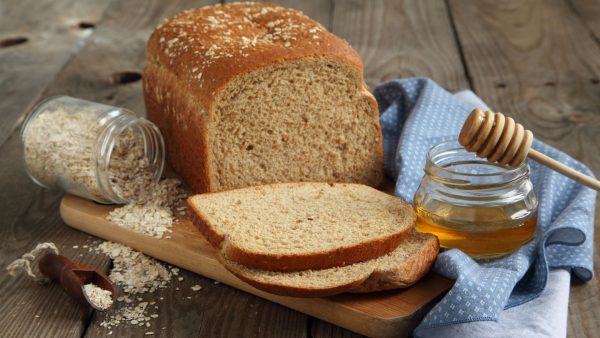
Recently, a good friend moved into a new home. The home was not newly built, but it was new for her, so when I went to visit her, I did what my mother would have done: I brought her the Jewish traditional housewarming gift: a loaf of bread, a box of salt and a jar of honey.
 Why these items? I spoke with Rabbi Dale Schreiber, emeritus senior rabbi of Barnes-Jewish Hospital. “Bread represents the hope for sustenance.” she said. “And without salt, you cannot live. It is essential for life, the thing that makes humanity possible.”
Furthermore, she said that the Hebrew word for bread, lechem, has many of the same letters as the Hebrew word for salt, melalch, creating a fast connection between the two.
ADVERTISEMENT

And the honey: it symbolizes the wish for sweetness of life.
Rabbi Mark Shook, rabbi emeritus of Temple Israel, said that the practice of bringing bread, salt and honey to a new home is not found in the Bible, though each ingredient is mentioned separately in many places. It is, however, not only a Jewish practice: It is a common practice in many parts of the world:
Bread: So that this house may never know hunger.
Salt: That your life may always have flavor.
Honey: So your life shall always have sweetness.
Winner of the Jewish Light Table Talk challah contest
Circa 1997 (Adapted from Myrna Hershman’s challah)
Makes 5 (1-pound) loaves
2 cups lukewarm water, 105 to 115 degrees
3 packages rapid rise yeast
1 cup sugar, divided
1 cup extra virgin olive oil
8 cups bread or unbleached flour, divided, plus more if necessary
1 teaspoon kosher salt
4 eggs
1 beaten egg for glazing
1 tablespoon each sugar, poppy or sesame seeds to garnish, optional
- Proofing the Yeast. Mix the water and yeast in a 2-cup glass or pottery bowl. Add 1 teaspoon of the sugar. Stir with a fork and set aside in a draft-free place about 10 minutes or until the mixture starts to bubble. If the mixture does not bubble, your yeast is old or your water too hot or cold. Start over.
- Mixing the Dough. Combine the yeast mixture in a large bowl with ¾ cup sugar, the oil and 3 cups flour. Stir until it looks like pancake batter. Cover the bowl lightly and set aside in a draft-free place for 30 minutes.
- After the yeast mixture has rested for 30 minutes, beat the 4 eggs and add them to the bowl. Combine the remaining flour and sugar with the salt and add to the bowl. Stir well or work the dough with your hands. If it is sticky, flour your hands.
- Kneading the Dough. Turn the dough onto a floured surface. Slap the dough down; fold it over from bottom to top. With the heels of your hands, push the dough away from you. Do a quarter turn with the dough. Repeat the process of folding and pushing the dough away from you with the heels of your hands and turning it for about 10 minutes, until the dough is smooth. Flour your hands if the dough is sticky.
- First Rising. Place the dough in an oiled bowl, cover with a damp cloth and set aside in a draft-free place for 2 hours or until the dough has doubled in size. To know if it has raised enough, stick a finger in the dough. If an indentation remains, the dough is ready to be shaped into loaves. If not, let it rest a little longer.
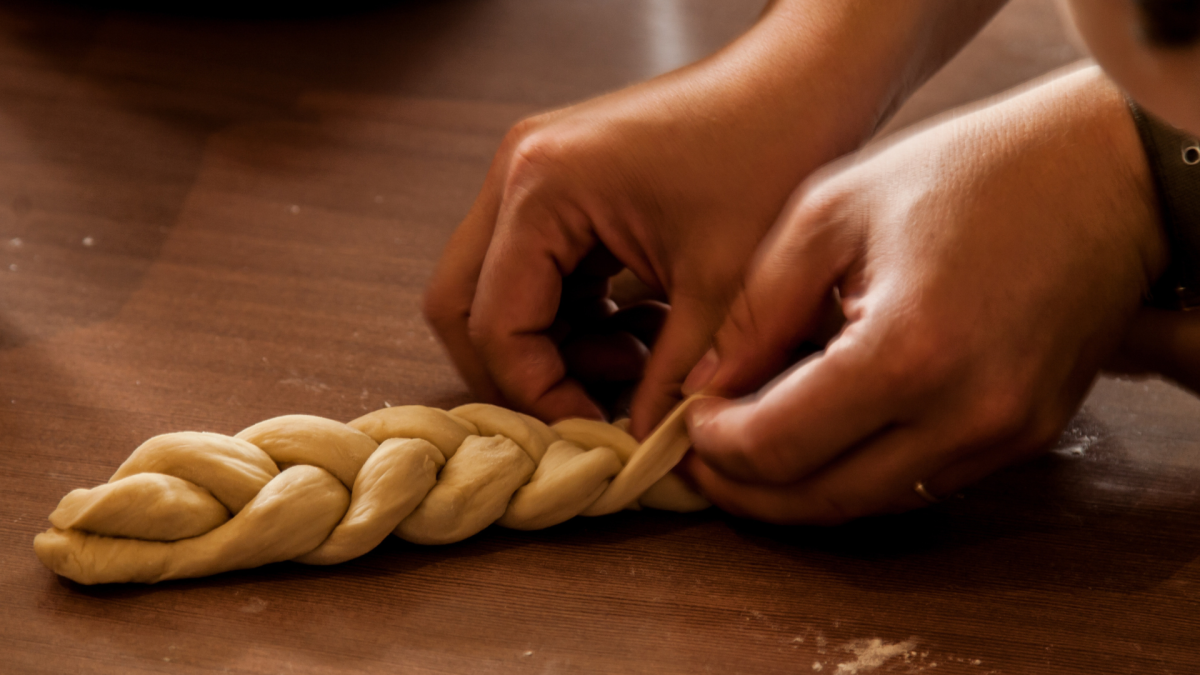
- Shaping the Dough. Pull the batter away from the sides of the bowl and knead it lightly. Divide it into 5 portions. Work with one portion at a time, keeping the rest covered.
- Divide each portion into 4 pieces. Roll 3 of them into long ropes of equal length; braid them, tucking ends under. Divide the last piece into 3 ropes, which will be short. Braid them and place the braid on top of the loaf. Place the loaf on a lightly greased baking sheet. Continue with the remaining portions.
- Second Rising. Cover the loaves lightly and let them rise for 30 minutes in a draft-free place. Preheat the oven to 350 degrees.
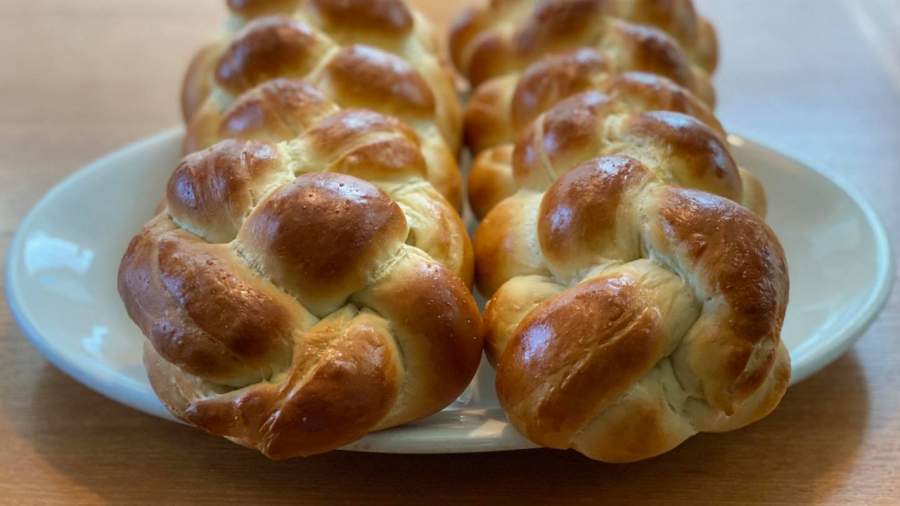
- Baking the Challah. Brush the tops of the loaves with the beaten egg. Sprinkle with sugar, poppy or sesame seeds and bake 25-35 minutes or until bottoms are firm. Because rising takes place in the oven in the first 15 minutes, do not open the oven door.
- The bread is done when it sounds hollow when thumped on the bottom.
Some notes:
- I often add a cup of raisins in step 3.
- You can make fewer larger loaves and simply braid them. For round challah, roll the dough into a 12-inch rope. Starting in the center, coil the dough into a circle, tucking the end under.
- To start challah the day before, do steps 1-5, refrigerating the bowl of dough covered with a damp cloth. Punch it down before you go to bed—it could climb out of the bowl. The next day, let the dough come to room temperature, about 1 hour. Punch it down and divide it into portions. Let it rest about 10 minutes. Shape it and let it rise about 55 minutes. Bake as above.