
How to make my grandma’s Russian dumplings
Published May 6, 2020
This recipe originally appeared on The Nosher.
My grandmother’s kitchen was barely the size of a hot tub. Somehow, in that tiny, immaculate space she could cook enough food for a party of 20. The kitchen’s best features were an overhead skylight streaming it with light, and an eat-in kitchen counter that you could sit on the other side of while she cooked. Growing up, I sat and watched her make food as often as possible, and sometimes I had the fortune of licking spoons of batter, or trying the first freshly made latke.
Her kitchen was full of objects that she brought with her from Ukraine when she immigrated to the States in the late ’70s. On top of her fridge was an electric samovar, on her counters were sets of white enamelware, and sometimes she pulled out a pelmenitsa from the pantry. A pelmenitsa is a mold for making pelmeni, a type of dumpling that is common across the former Soviet Union.
Pelmenis are made with a simple dumpling dough that consists of flour, water, and sometimes egg, and are traditionally filled with ground meat. Typical fillings include chicken, beef, lamb, pork, or a combination of meats. A vegetarian option is made with a minced mushroom filling.

The filling is seasoned simply with the addition of salt, pepper, onion and garlic. Once the dumplings are made and formed, they are cooked quickly in simmering water. Each family has their preferred toppings for pelmeni. Some top them with sour cream, caramelized onion, fresh dill, or vinegar.
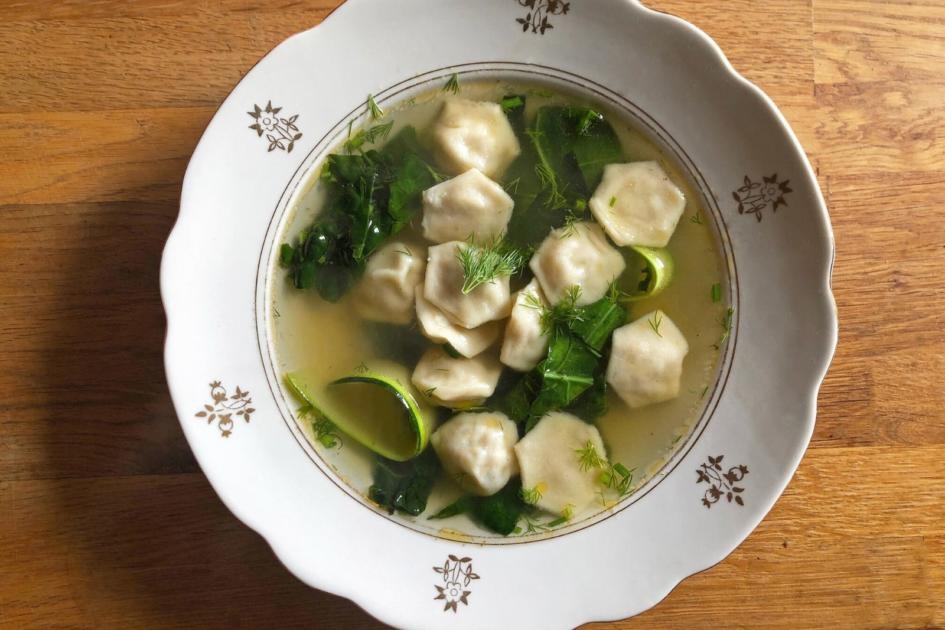
My personal favorite way to eat pelmeni is in a bowl of homemade chicken broth, with a good amount of fresh greens added to it — like kale or turnip tops. I always garnish the pelmeni with an excessive amount of fresh dill.
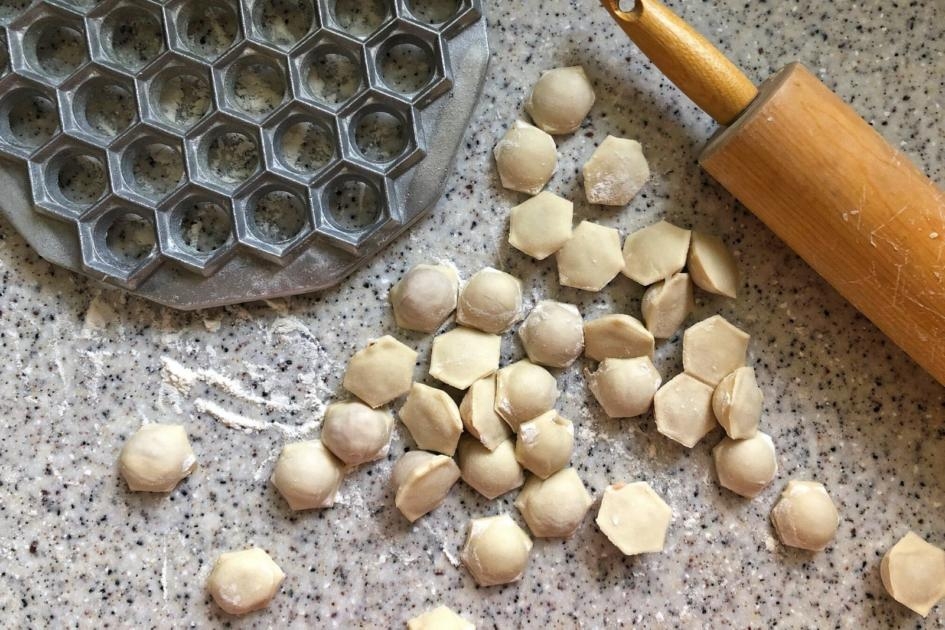
The pelmenitsa is a pleasing honeycomb-shaped mold that forms 37 dumplings at a time. They are available online, and eBay has some for just a few bucks.
These dumplings can also be made by hand with little more than a rolling pin and a water glass. You can roll out the dough thin, and cut out circles to form the pelmeni into tortellini-like shapes. If you have a potsticker mold, you can use that to shape the dumplings as well.
This recipe takes some time and effort, but it has a great return on investment of energy. It’s wise to make a big batch and stock up while you’re putting in the work. Many folks make double or triple batches at a time, because the dumplings can last for months in the freezer.
There is a unique satisfaction that comes from homemade dumplings. It feels like a culinary achievement of the highest order. If you’ve ever made pasta dough, this is a cousin to that process.
If you’ve made a filled pasta, then you’ve basically made pelmeni. The trickiest bit is rolling out the dough so thin that it is vellum-like, and then filling each pocket with just the right amount of mixture so that the edges can firmly seal shut, and get smooth and glossy once simmered.
After all the work, there is such satisfaction when the pelmeni finally come out of the pot, fully cooked and shining. That first bite is always a little too hot, but it is nearly impossible to wait any longer for them to cool down.
Ingredients:
For the dough:
3 cups all-purpose flour
¾ cup + 1 tablespoon water
1 large egg
2 teaspoons kosher salt
For the filling:
1 pound dark ground chicken
½ medium yellow or white onion, grated on the medium size hole of a box grater
2¼ teaspoons kosher salt (Diamond Crystal brand)
1½ teaspoons garlic powder (optional)
Ground white or black pepper, to taste
Directions:
1. To make the dough: Add the flour and salt to the bowl of a stand mixer fitted with a dough hook attachment. Add the water and egg to the center, and turn the mixer to low until it starts to combine. If for any reason, it is not starting to ball up and looks dry, add another tablespoon full of water. Increase the speed to medium, and allow the dough to knead for 8-10 minutes, or until very smooth, soft, and elastic. If the dough is feeling very sticky and not forming a smooth ball, add a little more flour, one tablespoon at a time. Alternatively, this dough can be made by hand, but it takes double the kneading time.
2. Cover the dough and let it rest for 1 hour on the countertop. While the dough is resting, you can make your filling and get all of your toppings prepared and ready to serve with the cooked dumplings.
3. make the filling: Add the ground chicken, grated onion, salt, garlic powder, and pepper to a bowl. Mix until combined; be careful not to overmix as the meat can get tough. I like to test my mixture for salt and flavor by taking a tablespoon full and forming it into a small patty. I cook the meat off in a small pan, and then taste and adjust the seasoning if needed.
4. To assemble: Once the dough has rested, divide it into six equal-sized balls. This will yield 3 sets of 37 dumplings if using a pelmenitsa. Dividing the dough into six can be done by weight or by approximation. On a lightly floured surface, begin to roll out one of the balls until it is about 12” in diameter, and very thin.
5. If using a pelmenitsa – generously flour the mold, and drape the dough over it so that there is at least an inch of overhang. Roll out the dough wider if necessary. I like to gently press into each of the 37 holes before filling. Using a small spoon or piping bag, add about a ½ teaspoon of the filling into the center of each dumpling, so that they are just filled. On a lightly floured surface, roll out another ball of the dough until it is also about 12” in diameter. Once rolled out, lightly brush the surface of the dough with water, and place it on top of the filled dumplings. Using your rolling pin, firmly roll over the top of the dumplings, sealing the two layers of dough together. You will see and feel the dumplings drop into their molds below the rolling pin; the metal will start to poke through between the dumplings. Flip over the mold, and the dumplings should easily come out with a gentle tap. If not, you can nudge them out with a poke from the bottom-side with the round holes.
6. If making pelmeni by hand: Roll out one-sixth of the dough to about 12” in diameter. Use a 2-inch round cutter or a similar-sized drinking glass, cut our rounds out of the dough. Fill each circle with about ½ a teaspoon of filling. Using your finger or a brush, lightly dampen the edges of the circle with water. Pinch the circle upward, sealing the dumpling into a half-moon shape, then fold the ends inward and press them together. This will make a dumpling that looks similar to tortellini, without the pointed top. You can also keep the pelmeni in half-moon shapes, just make sure they are well-sealed.
7. Once formed, transfer the pelmeni onto a lightly floured baking sheet. You can immediately cook the dumplings, or you can freeze them. Once they are fully frozen on the tray, transfer them to a freezer-safe container for long term storage.
8. To cook the pelmeni: Bring a large pot of water to a boil. I make 30-40 pelmenitsa-sized dumplings at a time. How many dumplings you add depends on the size of the pot; you do not want to overcrowd them, and may have to cook the dumplings off in batches if you’re preparing many at once.
9. Add the dumplings to the pot, and let them simmer for 4-5 minutes. Once they float to the top, let them simmer for an additional minute. Test one by cutting it in half if you are uncertain, and make sure the meat is fully cooked through and no longer pink.
10. To serve: Add the cooked dumplings to bowls, and add the soup, or your favorite toppings, to the bowl. Serve immediately, as they’re best hot and fresh.