
How to make old world Hungarian pickles at home
Published April 20, 2022
No pickles could be as wonderful as those my grandmother made. I was a devoted fan, and luckily I don’t have a sweet tooth. You can eat all the pickles and sauerkraut you want and never put on a pound.
Unfortunately, back in my younger days, I was too smug and too silly to find out exactly how she made them, and most of the pickles I’ve since encountered have been made with vinegar, so they just weren’t right.

When I lived in Germany, I did find the equal of those my grandmother made, as well as whole heads of pickled cabbage: both, stocked in big wooden barrels, were sold on the market in Munich.
However, this was some time ago, and I left Germany in 1992. After that, my pickle frustration was hard to bear. Until I moved to Hungary.
Finding old-world Hungarian pickles
There I was, living in a small village in the east of the country. I couldn’t speak a word of the language, and I knew nothing about the culture, but I couldn’t help noticing the large, cloudy-looking jars that, in late summer and early autumn, were placed on sunny window ledges. And…they looked like they were filled with pickles. Really? Was it possible?
It was my new friend Klarika who cleared up the mystery (with much sign language, pidgin Hungarian mixed with pidgin English and pidgin German). I can guarantee that the pickles, pickled cabbage, and sauerkraut that result from this old recipe are a real treat.
Hungarian pickles: Here’s how to go about it
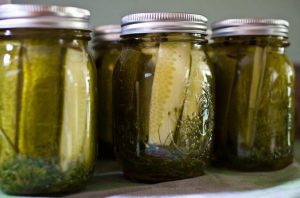
For one large mason jar, take a batch of pickling cucumbers — not eating cucumbers. Slice them lengthwise twice (an X shape) without detaching them from the base. Pack them tightly into the jar. Add lots of fresh dills, several whole fresh garlic cloves, whole black peppercorns, and some juniper berries.
If you like them a bit spicy, you can also add a few tiny dried red peppers. I even add some fresh ginger for that extra tang. Now you have to add the salt and water, but since these pickles are fermented, it’s best to use bottled water: the chemicals in tap water might slow down fermentation. If you don’t have bottled water, let tap water stand overnight so the chemicals evaporate.
Heat enough water to dissolve around two heaping tablespoons of kosher salt. Then add this to enough water to completely cover the pickles. In fact, you might even have to add more salt — yes, I know this isn’t a precise way of going about it, but just taste the water. It should be as nice and salty as the sea but not too horribly salty. That means approximately one tablespoon of salt to two cups of water.
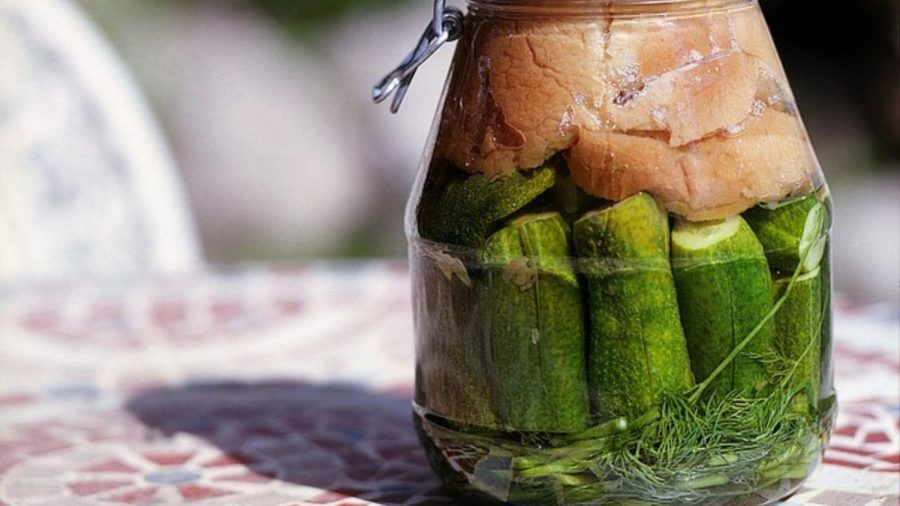
If you have more dill, top the pickles with it, and here’s the most important part…push it all down with a chunk of good yeasty bread (rye bread or any natural crusty bread, not soft sandwich bread which will just turn into mush.) When the bread is also covered by the salty water (weigh it down with a plate or cup if you have to), cover the jar either with a piece of cloth held in place by string or an elastic band or put the lid down loosely so that any gas can escape.
Use the sun in fermenting Hungarian pickles
Put your jar in the sun — this is strictly Hungarian. In other countries, fermented pickles are kept in a dark place, but I’ve always had success with this method.
It should start getting cloudy with little bubbles after the second day. That’s fine because it means the fermentation process has begun. Keep checking that this is happening.
If you’re doing this inside your house, it’s best to put a plate underneath because the liquid will start seeping out. Taste your brine from time to time: it has to stay salty! If it doesn’t, add more salt — salt keeps nasty bacteria away. Depending on the weather, do start tasting the pickles after the third day. You don’t want them to get mushy.
After a few days . . .
You can also remove the bread because it has done its work of getting good yeast into the jar. If the bread has gone moldy, no problem. That doesn’t affect the pickles. After four days, taste the pickles. You don’t want them to get too soft. If they are ready, put them in the fridge. If not, leave them for another day. I find they are usually ready after three days, but I suppose it all depends on where you live and the climate.

Finally . . . enjoy
After that, enjoy! Some people claim these pickles should be eaten over the next two weeks, but I’ve certainly kept them for far longer than that in the refrigerator. If there is a white powdery film over the top, that is fine. Just skim it off.
Adjusting the Hungarian pickles recipe for pickled cabbage
For pickled cabbage, it’s the same process, only you separate the leaves before stuffing them into the jar, and it will take far more time before they are ready. Cabbage will also keep for far longer than pickles. I do remember that my grandmother blanched the leaves in boiling water for a minute before putting them in the jar, but I’ve never done this.
Changing the Hungarian pickles recipe for sauerkraut
And, by the way, this is almost the same recipe I use for making sauerkraut — homemade fermented kraut is wonderful. The only difference is, that I break up the sliced cabbage by squeezing it several times and removing the crunch before putting it into the jar — this will help release the water.
I don’t put the jar in the sun, but in a dark corner, and I make sure that, after a few days, the kraut has released enough water to cover the surface. If it hasn’t, add a little bottled water and salt. It can take from two to three or four weeks to mature. Keep tasting it, and you’ll know.
Once it’s the way you want it, keep it in the fridge and help yourself whenever you have the munchies. Make sure there is always enough brine to cover the kraut, and it will still be good to eat in a year. The kraut and/or the juice can be added to soups or simply enjoyed as is! It is certainly very healthy.
Hungarian pickles recipe

prep time: 15 MINUTES
additional time: 3 DAYS
total time: 3 DAYS 15 MINUTES
This recipe for old-world Hungarian pickles is perfect for those comfortable with flexibility, as no precise measurements are included. The measurements are handed down, imprecise, and change with each pickle maker. This allows you to choose the perfect flavor for your Hungarian pickles.