

This Week in Mah Jongg: Game Strategy (Part 1)
Published September 20, 2021
In our last article, we introduced the topic of game strategy and gave some general advice to get you started. The next few articles will delve deeper into this fascinating topic and discuss why it’s such an important part of the game of American Mah Jongg.
This article focuses on the very beginning of the game, once your initial tiles have been received. We’ll begin our discussion with tile organization, followed by one of the most difficult decisions for many players, choosing a hand.

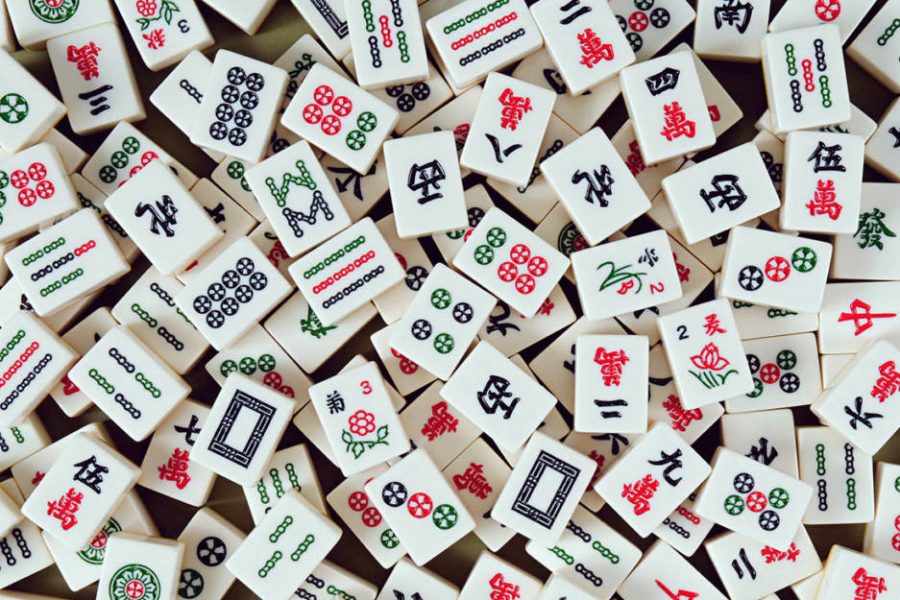
TILE ORGANIZATION
The way you organize the tiles on your rack is a matter of personal preference and there's no official right or wrong way. There are ways, however, to be more efficient and we’ve listed a few tips below.
Initial racking
Once all your tiles have been received, it's important to organize them in a way that will help you to quickly identify patterns.
- Organize your number tiles by suit in numerical order. The order of the suits is up to you, but you may wish to remain consistent from one game to the next
- Flowers are generally kept on the left (since, in most cases, they appear left on the card)
- Dragons, winds, and jokers can either be placed between flowers and suits or after suits
- Once your tiles are in order and you’ve studied them, you’ll likely begin to see themes and get an idea of the direction you wish to head
- For further assistance, you may like to reorganize your number tiles into purely numerical order (one suit after another, for each particular number). This layout could help identify additional directions for your hand. We’ll discuss choosing a hand in the Analysis section below.
Once you've identified a potential hand or hands
- If one particular hand stands out as the frontrunner, reorder your tiles to match the order on the card
- If you have identified several potential hands (or sections of the card), re-order your tiles to model the different options, making note of how many of your tiles fit each potential hand.
- Physically place jokers into the hands you are modeling, instead of leaving them at the end of your rack. You may change where you use the joker as the game evolves, but it will help you to make quicker discard calls if you can more easily visualize them as part of your targeted hand.
- As you gain experience, you’ll be able to do this shuffling quickly, and most of it will take place in your head, rather than needing to physically move the tiles.
As the game progresses
- It is easier to see what you have if you leave a space between blocks of tiles on your rack. However, by doing so, you are giving other players clues as to which hand you're playing. Experienced players will be able to figure out your hand based on discards, exposures, and your tile organization. So, it’s a good idea to keep your blocks together
- Some people advise turning the tiles of a completed block upside down, so that they know they don't have to worry about that section anymore. This may be helpful, especially for beginners, but once again, experienced players will notice you turning tiles and it will help them determine your hand (especially if you leave gaps)
- Keeping flowers on the left makes sense since that's typically where they are, in most hands, on the card. But bear in mind that astute players will notice you placing your picked tile on the left, giving them one more potential clue to the hand you are playing. It may be wiser to rack the flower in a random spot, and at a later point move it to the left once the attention is no longer on you
- When making an exposure, the temptation is to place it in the correct order/location in relation to the remaining tiles on your rack. However, doing so gives another clue to the players at your table. Now, not only do they know you're playing, say, a pung of 5 cracks, but they have a hint as to that grouping’s position, which helps narrow down your hand choice. It's best to place your exposures to the left of your rack and follow with the next exposure to the right of that and so on. Your exposures do not need to be in the order they are on the card (your tiles can be reordered once you call Mah Jongg)
- Keeping a "trash pile" on the right-hand side of the rack is also a common habit. As discussed above, if you leave a clear gap to the left of that block, this will give a clue to others as to how far along you are (by looking at the number of tiles in that block). Here too, eliminating the gap will prove helpful (albeit a little more mentally taxing).
INITIAL ANALYSIS / CHOOSING A HAND
Once faced with the tiles you’ve been dealt, choosing which direction to go can seem like a daunting task, especially for beginners. What’s the best way to make sense of this jumble of tiles and match them to one of the ~50 possible hands on the card? It’s easy to feel overwhelmed as you try to create order out of what seems like chaos. This section gives a structured approach to choosing a hand, or a set of potential hands.
You only need to pick a section
The first thing to realize is that, at this early stage in the game, you don't need to settle on a specific hand. You just need to determine which section(s) of the card (evens, odds, consecutive runs, etc) your tiles lend themselves to.
ADVERTISEMENT

Build around strong combinations
- Be on the lookout for tiles that may be harder to come by later. Pairs are the best example here, since you cannot use jokers for these or call discards (other than for Mah Jongg). So, if you have a pair, it's generally a good idea to use it as the basis for your hand
- Build on multiples. If you have 3 or 4 of a particular tile, this is a strong foundation on which to build and, hopefully, there are other tiles in your hand that fit with this set.
- Flowers are usually in high demand and are less likely to be passed in the Charleston
- Look out for combinations of single tiles (such as NEWS or the year)
- Depending on the current year, certain tiles will likely be in high demand. For instance, on the 2020 card, 2s and white dragons were hot commodities, in 2021 that shifted to 2s, white dragons, and 1s. Scan your tiles as these may be present and could be the beginning of a great hand!
Check your options to see which of the combinations you’ve been dealt actually fit together (pairs, flowers, combinations of single tiles, etc). You may be excited to receive two pairs, but if there’s no hand on the card that uses both sets of pairs, one of them is essentially useless (but, could be used later as joker bait - more on this another time). If you are able to use the two pairs in one hand, you definitely have a strong contender!
Next, look at hands that use your base combinations and see how many of your other tiles work with them. This is where your knowledge of the card comes in handy, as it helps quickly determine which combinations work together. If you have to look at each hand line-by-line, you're only going to increase your stress level!
Lots of jokers
If you're lucky enough to have two or more jokers from the get-go, consider the quint section of the card (since you will need jokers to make those hands). Also check to see how they can complement your existing combinations.
Look for trends
If you have no pairs or singles combinations, then look for a trend in the tiles. For example, do you have:
- Lots of even numbers?
- Lots of odd numbers? And, if so, are they mostly high (5, 7, 9) or low (1, 3, 5)?
- 3s, 6s and 9s?
- Several winds and dragons?
- Several number tiles closely related (within 1 or 2 of each other)? Consider consecutive runs. This section is typically the easiest since it offers a lot of flexibility
- There are many more trends to consider, but we’re sure you get the gist.
Again, remember that at this point, you only need to pick a section (not necessarily a specific hand).
Several options
If you have a few potential hand options, you may not need to make a final decision yet. As long as you have three tiles that definitely do not fit into any of your options, just pass those first and see what comes your way in the Charleston.
If you feel you have too many options, try to narrow them down using the following criteria.
- Choose the option that requires the fewest number of pairs (other than those you already have)
- If you have both concealed and non-concealed options, the non-concealed option will likely be the safer choice in this particular scenario
- Count the number of tiles you have for each option (include jokers in the count) and go with the one that has the greatest count (having first taken the previous criteria into consideration).
No option
If no clear winner (or even potential option) emerges, pick the 3 tiles that are the least likely to fit with the rest and pass those (hoping a better pattern emerges during the Charleston). This is often the time to look more closely at sections of the card that you rarely visit! Even with no clear direction at the beginning of the game, you’d be surprised how quickly a pattern can emerge and a solid hand starts to take shape. So, definitely don’t feel that all is lost if you get off to a slow start. This is where the real magic can happen!
Well, that’s all for this time. In our next article we’ll focus on Charleston strategy, so we look forward to seeing you again then.
Q&A’s
Readers’ questions:
Q: When playing in-person, should I place my discards in a particular place on the table in front of me, or should they be randomly placed?
A: It is good practice to place your discards in random places on the table. If you were to always place them just in front of your rack, then the other players would likely begin to build a pretty accurate picture of the tiles you don’t need. This would help them to guess which hand you may be aiming for! Also, try to keep similar tiles dispersed, as this will make it more difficult for others to quickly see how many of a particular tile has already been discarded.
Q: Can a joker be used for any of the hands in the Singles and Pairs section of the card?
A: The short answer is no. It’s not possible to use jokers for a pair, or for single tiles, so there just isn’t any place for them in this section of the card. Therefore, if you have several jokers, you may wish to find a suitable hand in another section where they can be utilized.
Q: Who gets the tile? I was next in line and called a discard for an exposure and another player called it for Mah Jongg.
A: Mah Jongg always takes precedence, so the tile would go to the player calling it for Mah Jongg, no matter where that player is seated around the table.
Q: What do the X and C beside the values on the card mean?
A: The X stands for Exposed and the C signifies that the hand is Concealed. If a hand is marked with an X you can claim discards and expose these on your rack during the game. If a hand is marked with a C, it is not possible to claim a discarded tile and therefore no exposures can be made - in this case, all tiles will be displayed on top of a player’s rack only once Mah Jongg has been called. Concealed hands are therefore more difficult to achieve than exposed hands, and command a higher value.
See you next time! In the meantime, keep your questions coming! Please email them to [email protected].